(#4) Cabin Chronicles: The Great Cabin Purge
Our Yellowstone cabins looked rough when we first saw them, but we were in road trip mode, and it was a rushed walkthrough on our way out of town. The potential stood out more than the problems. (Or maybe we just weren’t looking closely enough.)
Either way, we’re back, with keys in hand and rose-colored glasses off. Four cabins less than one mile from Yellowstone’s North Entrance are officially ours, and… well, it’s worse than we remembered. One cabin was partially finished. Another didn’t have water. (Oh, wait—we knew that.) One needed to be torn down. (That part was new.) And two were packed to the brim with stuff. (Note to future self: think twice before requesting fully furnished.)
Despite the chaos, we couldn’t help but see what this place could be. The walkability to town was better than we realized. The view of Electric Peak? Absolutely incredible. Sitting on our front porch, surrounded by mountains, still felt like the start of something big. It’s going to take time, effort, money, and a lot of learning, but we’re all in. We’ve got four cabins, two heads full of ideas, and one very steep learning curve ahead. Here we go!

From Fully Furnished to Fully Overwhelmed
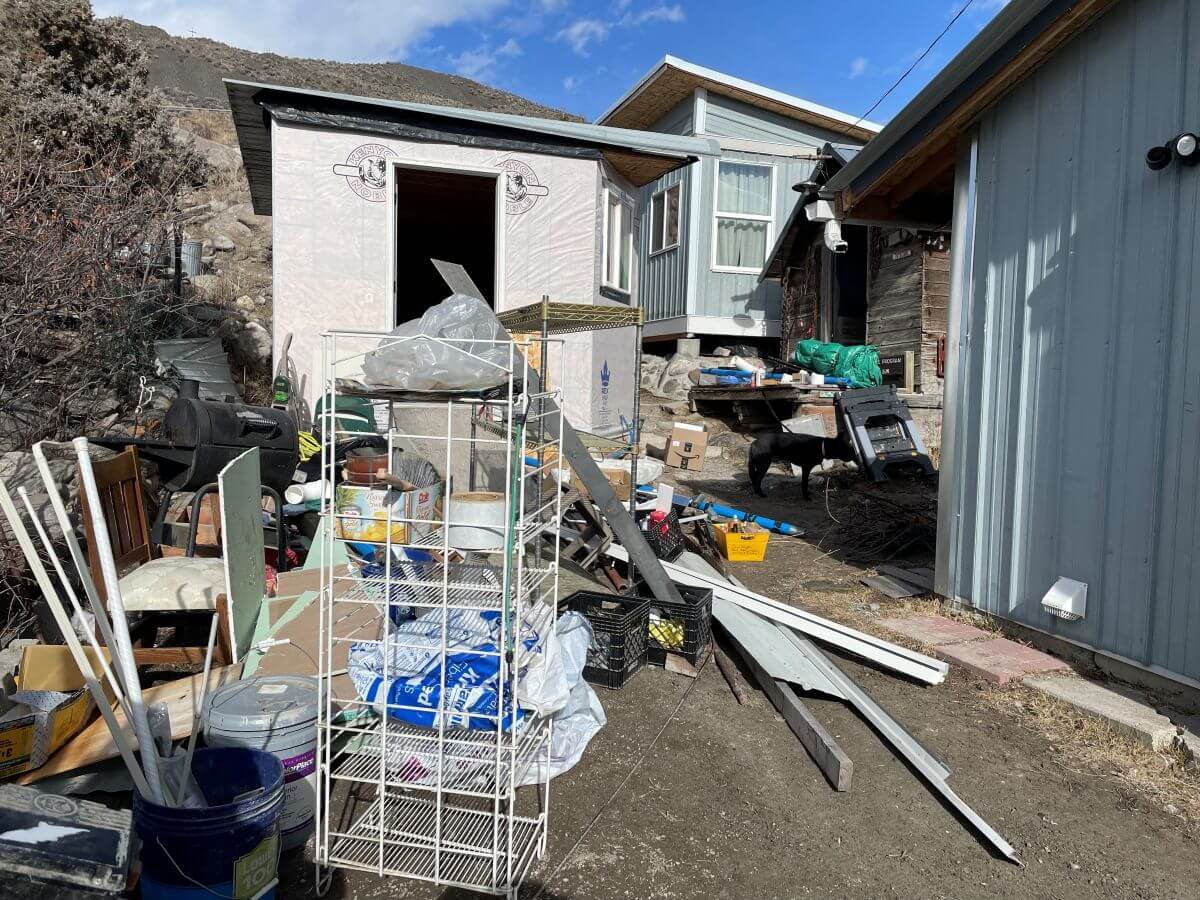
When we asked for the cabins to be sold fully furnished, we were thinking beds, a couch, maybe a kitchen table if we were lucky. What we got was… everything. Every single rusty, dusty, questionably useful thing. Every weird scrap of wood, every cracked bucket, every broken appliance, every mysterious container of who-knows-what.
The Yellowstone Cabin and Unfinished Apartment were packed wall-to-wall, floor-to-ceiling, with a truly awe-inspiring amount of stuff. We found old construction supplies, decayed furniture, buckets upon buckets of nails, a flame thrower, and even a motorbike. (That, we’ll keep!)
Some of it we could use. Most of it we could not. All of it had to be moved, sorted, donated, sold, or dealt with. This is the story of how “fully furnished” turned into fully overwhelmed. Welcome to The Great Cabin Purge!
Let’s Take It Back Now, Y’all
When we first toured the property, we knew buying the cabins would mean we’d have a decision to make about the Dry Cabin. Do we leave it dry and lean into it as a “glamping” experience, or add plumbing to transform it into a fully functional, standalone unit?
Here’s where things got tricky as we dug in deeper to understand our options.
Do you remember how the Unfinished Apartment had water and sewer lines already stubbed in? Do you also remember that our inspector, realtor, and friend (who happens to be an engineer who works in sewer infrastructure) all commented on how those lines don’t look buried deep enough to survive a Montana winter?
Well, they were right.
The silver lining to receiving this news, though, meant the next news wasn’t as hard to hear. Excavators, plumbers, and contractors stopped by to give us quotes to add water and sewer lines that would make the Dry Cabin addition possible. Everyone said the same thing: the only viable route for laying pipes required going directly through the foundation and footprint of the Unfinished Apartment.
The space between the cabins wasn’t wide enough for the necessary equipment, meaning there was no way to excavate properly unless the building came down first. So even if it had been stubbed in at proper depth, it wouldn’t have mattered. The Unfinished Apartment was standing in the way of plumbing for the Dry Cabin.
Had the Unfinished Apartment been structurally sound and built to code, we might’ve spent months or even years trying to salvage it and find a workaround. But because it wasn’t up to code, wasn’t finished, and was literally in the way of our progress, the decision was simple. (Not easy, but simple!)
Three Steps Back, One Leap Forward
We need to backtrack to move forward. Since we’ve decided to add a bathroom onto the Dry Cabin, we have to run water and sewer lines. To run those lines, we have to go under the footprint of the Unfinished Apartment. To do that, we have to tear it down, but before we can do that, we have to clear it out.
That’s what brings us back to The Great Cabin Purge, consisting of 48 hours of nonstop decluttering in our new, fully furnished home. Forty-eight hours of moving, sorting, lifting, dumping, donating, selling, and clearing the property just so we could then start working on the thing we actually meant to do.
It’s how progress goes sometimes, right? Sometimes it feels like you’re moving in reverse before you can jump forward, but eventually, the path clears, and all of the work is worth it. (Right???)
We’re rolling up our sleeves to declutter, hoping one day, we’ll wake up in the middle of the night able to use an in-unit bathroom, instead of bundling up, grabbing a flashlight and flip-flops, and making a run for the Main House. We know adding a bathroom to this Dry Cabin will improve daily life, rental value, flexibility, and long-term possibilities, but before we can make that happen, we have to take a few non-glamorous steps back.
Oh Look, More Stuff
Our Great Cabin Purge is taking place over the course of one weekend. (Which is pretty impressive now that we’re on this side of things, looking back.)
The Yellowstone Cabin, once an actual working ranger station in Yellowstone National Park, is an approximately 10x12 shed packed to the brim. We spend an entire day, plus a few hours the week prior, hauling everything out, lifting thousands of pounds of materials, making dump runs, and sorting through what might be usable. This part of the decluttering project was necessary because the Yellowstone Cabin will be our only storage space for things worth keeping after we demolish the Unfinished Apartment.
After the Yellowstone Cabin is cleared and organized, we set our sights on the Unfinished Apartment, which is closer to 10x20 feet in size. More stuff. More sorting. More dump runs. This building was filled with supplies, forgotten furniture, leftover fencing, nails, rebar, plastic sheeting, drywall, plywood, insulation, and even a concrete mixer.
There was too much stuff for two people to handle, so we brought in local hands (and a truck!) to help us load and haul what couldn’t be salvaged. It took four of us an entire day and multiple dump trips, but we cleared it, too. The good stuff, including a motorbike, a flamethrower (yep), a GoPro, and plenty of usable construction materials, got moved into the Yellowstone Cabin. Everything else got sold, donated, given away, or tossed.
By the end of the weekend, one structure was empty and demo-ready, and the other was organized!

Yellowstone Cabin: Before

Yellowstone Cabin: After

Unfinished Apartment: Before

Unfinished Apartment: Before

Unfinished Apartment: After
Demolition Day!
Once we cleared the third structure and sorted its mountain of mystery items, we were ready for demolition. We had a plan, and a team, and finally weren’t just cleaning, but actually building!
Our excavation crew handled the demolition, foundation removal, and haul-off of the old structure. They knocked the building down in less than two days, then started digging the trenches for new water and sewer lines.

While digging, they discovered the current retaining wall couldn’t support the new bathroom addition. Our options were:
Order massive, expensive boulders to hold up the existing retaining wall
Redesign the bathroom addition so that one wall would serve as a new retaining wall (which would require us to build side-by-side units that share a wall)
Build a new standalone retaining wall
We chose Option 3. It wasn’t the cheapest option, but it was one of the sturdiest, and it would let us preserve something we cared about deeply: the wildlife game trail.
There’s a wildlife game trail that runs from the hillside behind our property, past our cabins, and into town. Most homes in this area have fences that block the animals’ paths, but ours doesn’t, and we like that. We regularly see deer and elk strolling past, and we don’t want to cut off one of the last open crossings in this part of town.
When it came time to make a decision on the retaining wall, we prioritized the game trail and worked with our contractor to design a new bathroom layout that kept the trail open.

This is Where Things Got Increasingly More Interesting
The first part of the dig goes smoothly. Our excavation team ran lines under the now-demolished Unfinished Apartment to the Dry Cabin and now just has to continue the last stretch along the driveway to the street. It’s a straight shot and should be one of the easiest phases of the entire project.
Instead, things start getting increasingly more interesting from here on out. First, the boulders.
While digging up the driveway, our team ran into boulders the size of golf carts. They were able to dig around some of the boulders, but others had to be chipped away with a jackhammer. What should have been a 1-day job turned into a week of maneuvering and rerouting.

Next, the water line.
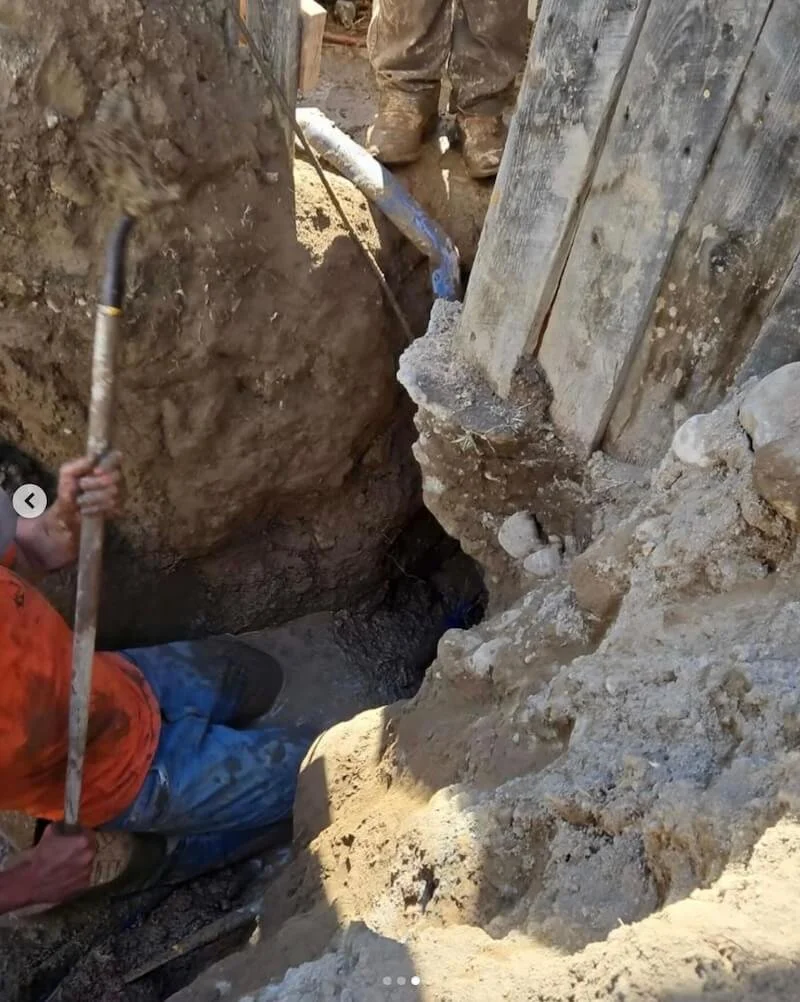
Our team came across an unmarked, very active water line running horizontally beneath our driveway. Not ours, but our neighbor’s.
The excavators hit it while digging (because no one knew it was there), and suddenly our driveway flooded. The city couldn’t shut off the water because our neighbor’s water meter was broken. It took hours of hand digging to trace the line and manually patch the break.
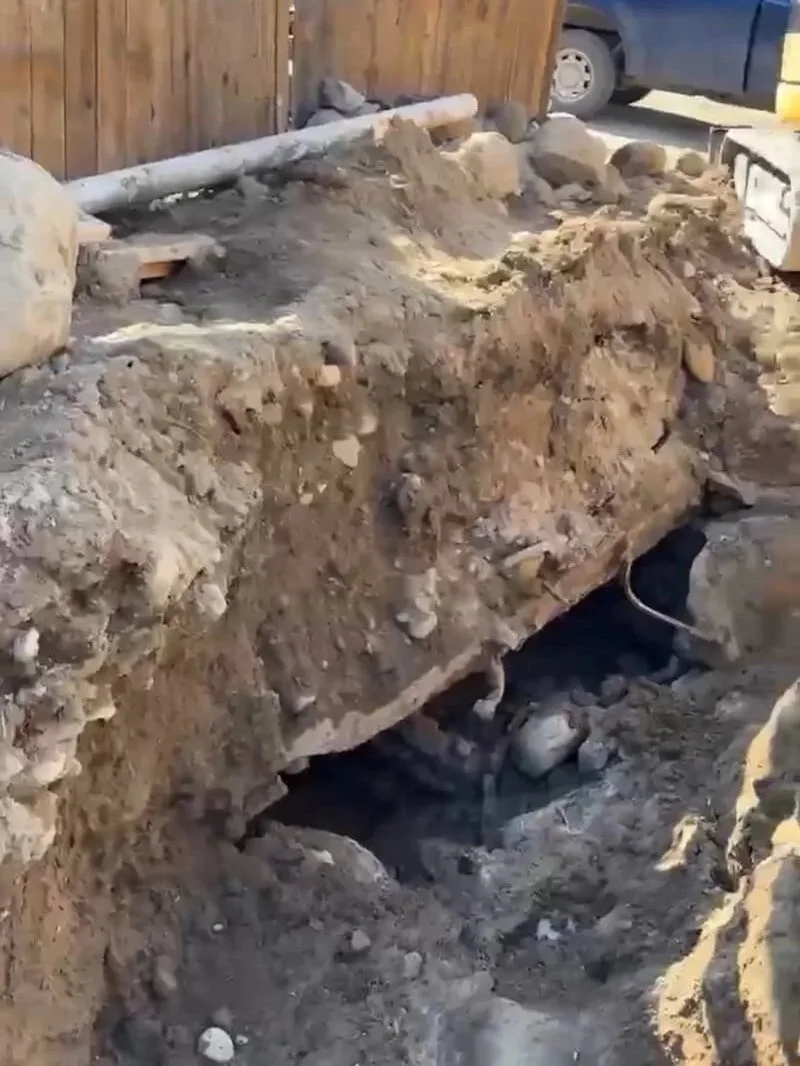
Finally, the Model T.
The frame of a Model T, to be exact. Buried under our front yard, to be more exact.
Turns out, the Main House, which was built over a century ago, had an old-school cesspool beneath its concrete slab, covered by what was once the body of a car. That car frame was holding up our front yard, part of our fence, and the slab that supported the deck. And the cesspool? Still hollow. We were one good freeze from a possible sinkhole.
Our excavation team gave us two options: ignore it and hope for the best, or fill it in properly.
We decided to fill it in properly (obviously!!!), using boulders, gravel, and dirt. But doing so came with a warning, because if the ground started to collapse while digging, we could lose our front yard or our deck, or both. We had our first-ever rental guests checking in next week, making this our first (but certainly not last) moment of wondering… what exactly did we buy?

Here’s a wheel as a souvenir. It’s still on our property to welcome guests!
Between November and March
Somehow, it all worked out: no sinkholes, no collapsed decks, no blocked elk highways.
We bought our cabins at the end of November and, by the end of March, we had:
Updated the electrical wiring in the Main House and made foundation repairs
Decluttered two cabins and removed thousands of pounds of stuff from the property
Demolished the Unfinished Apartment and its foundation
Poured two new foundations, one for the Dry Cabin bathroom addition and another for an eventual rebuild of the third cabin
Rebuilt a retaining wall and preserved our wildlife game trails
Filled in a sinkhole in our front yard, and took the opportunity to reinforce the Main House foundation even further
Installed concrete stairs to replace dirt stairs between the Main House and guest cabins
Added a French drain to prevent backyard flooding
Laid new pipes for water and sewer to the Dry Cabin
Finished the second bathroom and laundry room in the Main House
At this point, we were about $12k over budget, mostly due to the unexpected boulders and sinkhole in our driveway and front yard. But it was work we won’t have to do again, and it got us one step closer to our vision of having 3 fully functional, standalone cabins.
Around the same time, we also hosted our first two groups of guests, and that’s a story of its own worth telling…
Keep Reading: (#5) Cabin Chronicles: That Time We Hosted Our First Guests and Everything Broke
Related Posts